How it works
Before you attempt your Wahoo Kickr repair it’s probably worth understanding how it works. Essentially, a direct mount trainer takes on the roll of your back wheel. It adds on a power-meter, a method of applying resistance as well as a bunch of electronics that broadcast the data it generates to the software you connect it to. That software controls the level of that resistance, at the same time as capturing the data the trainer produces.
Connecting with the software
So, you mount your bike on this thing, as you would your rear wheel. You’ll need to plug it (the trainer) in, of course; although more advanced ones are powered as you peddle. You load your software of choice, Zwift in my case, on the device of choice and connect it to the signal from your Kickr via Bluetooth or ANT+. Then, you hop on your bike and pedal away.
The Zwift experience
Zwift provides predefined virtual courses in a virtual world. An avatar on a virtual bike in that virtual world is then driven around the course by your pedalling. The faster you pedal, the faster your avatar goes. When the virtual road goes uphill, you feel more resistance through your trainer as you pedal, mimicking the effect you get when going uphill IRL. When going downhill the reverse happens and the resistance backs off and makes pedalling easier. As all this is happening, your efforts are recorded for you to pick over later, so you can analyse it to your heart’s content; once you have recovered enough composure to be able to do that.
The mechanics of the direct drive thing
The chain on your bike drives a dummy wheel on the turbo via a cassette fitted to a freehub. The freehub is mounted on bearings to a fixed axle and spins the dummy wheel using pawls and what’s known as a ‘ratchet ring’ system. This is exactly as it is with a standard wheel.
Instead of driving a tyre, the dummy wheel drives a belt, which in turn drives a gear, which spins a heavy flywheel on a second axle. Electromagnets act internally on this flywheel to create resistance, and sensors pick up the data from the spinning flywheel. That data is then sent out to your computer, which responds in real time to control the resistance on the flywheel using the large electromagnets. Aside from the chunky frame on which all this is mounted, that’s all there is to it!
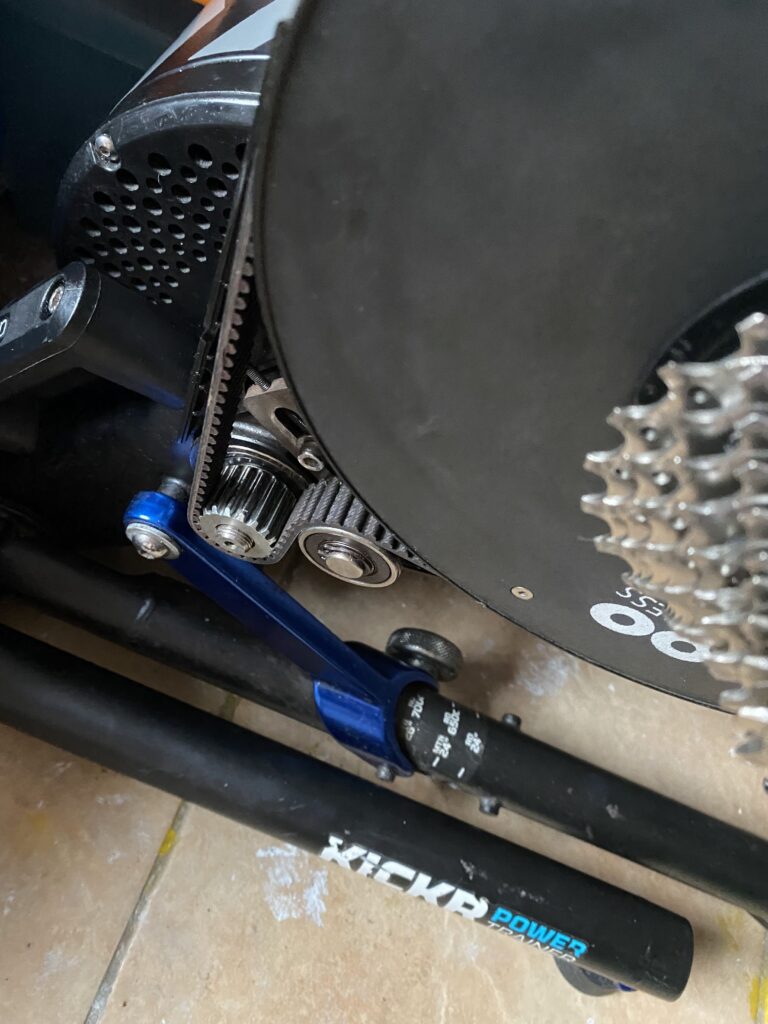
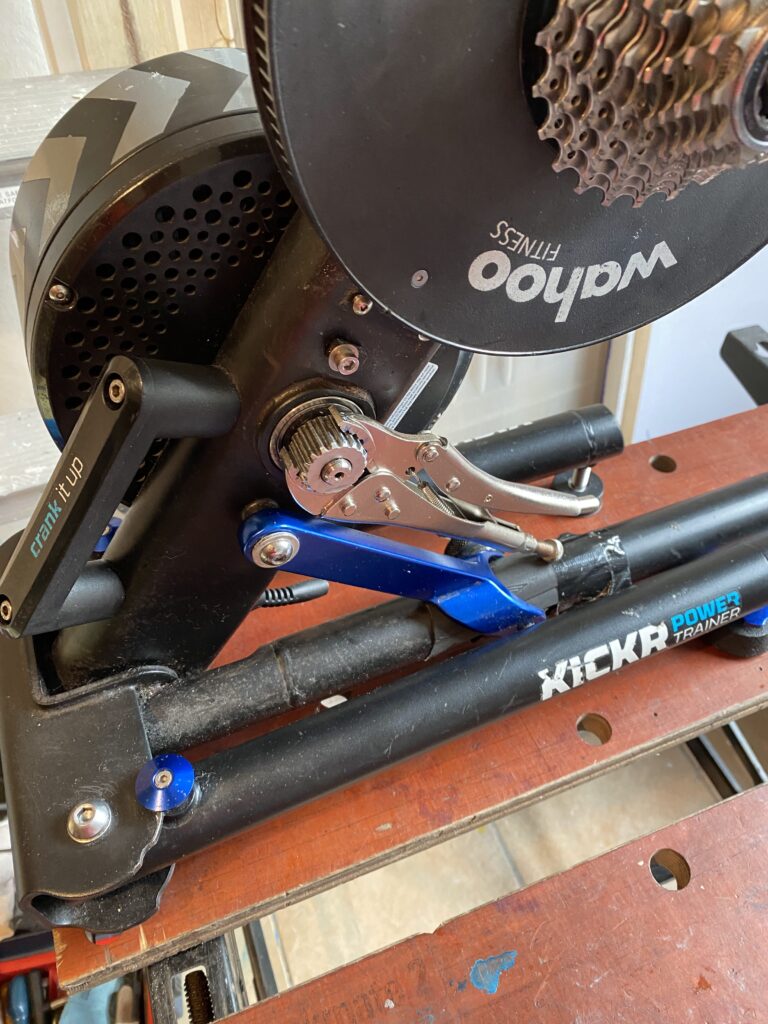
Part 1:- Wahoo Kickr repair. The upper pulley and freehub restoration. (The beginning of my problems)
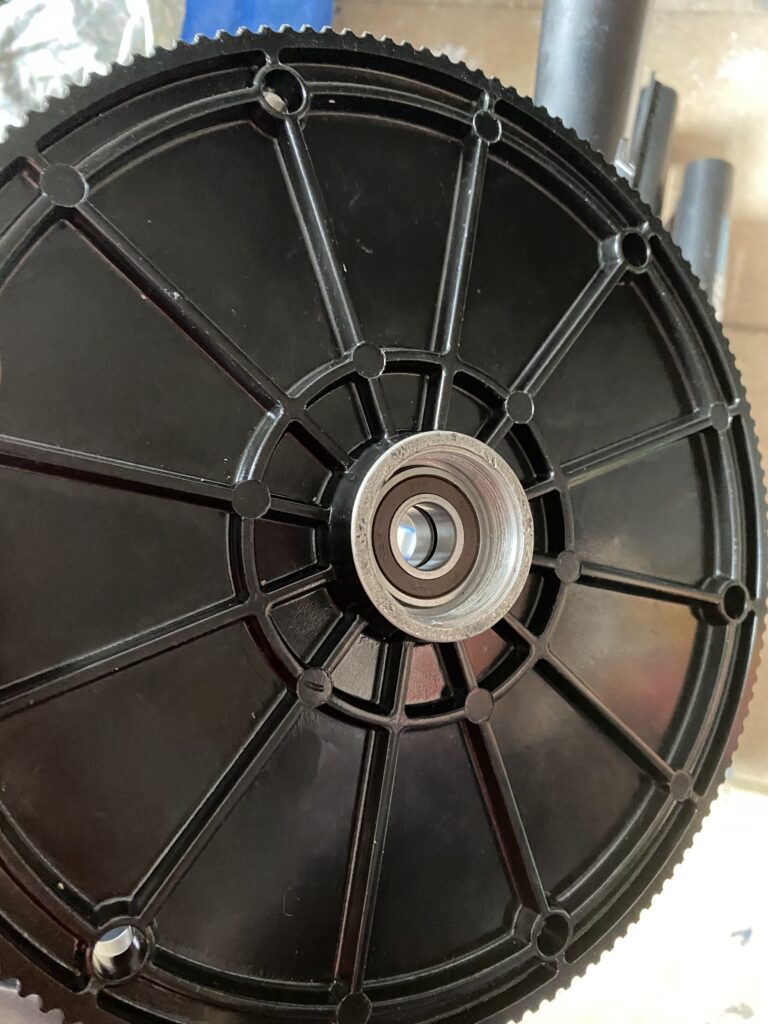
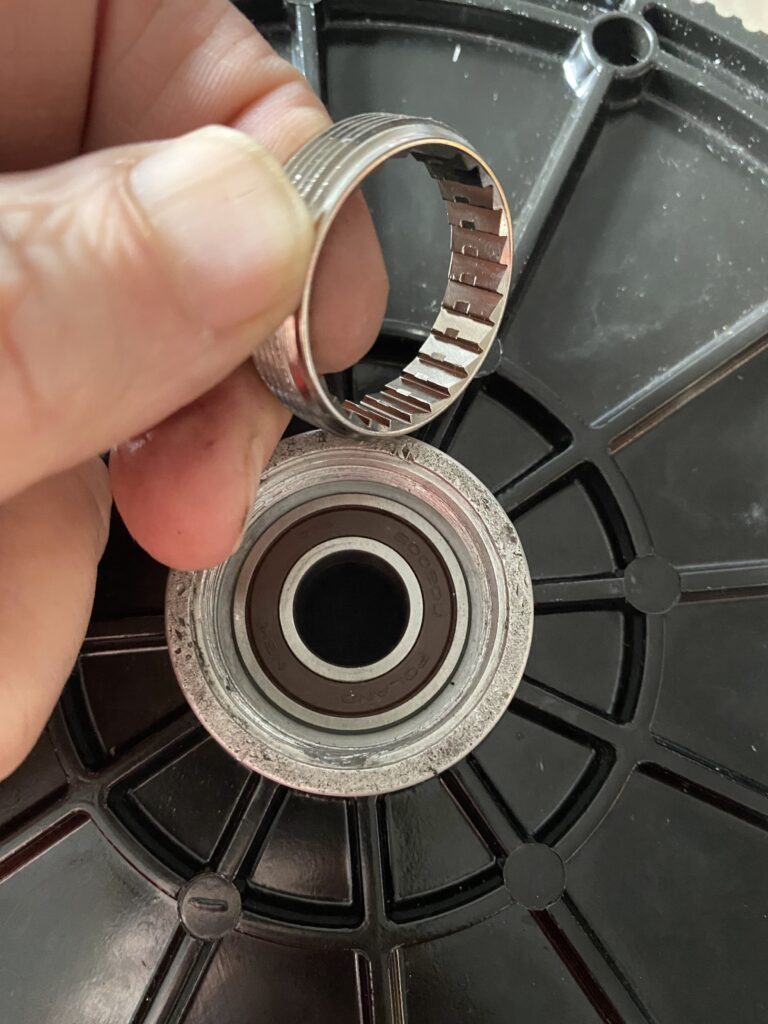
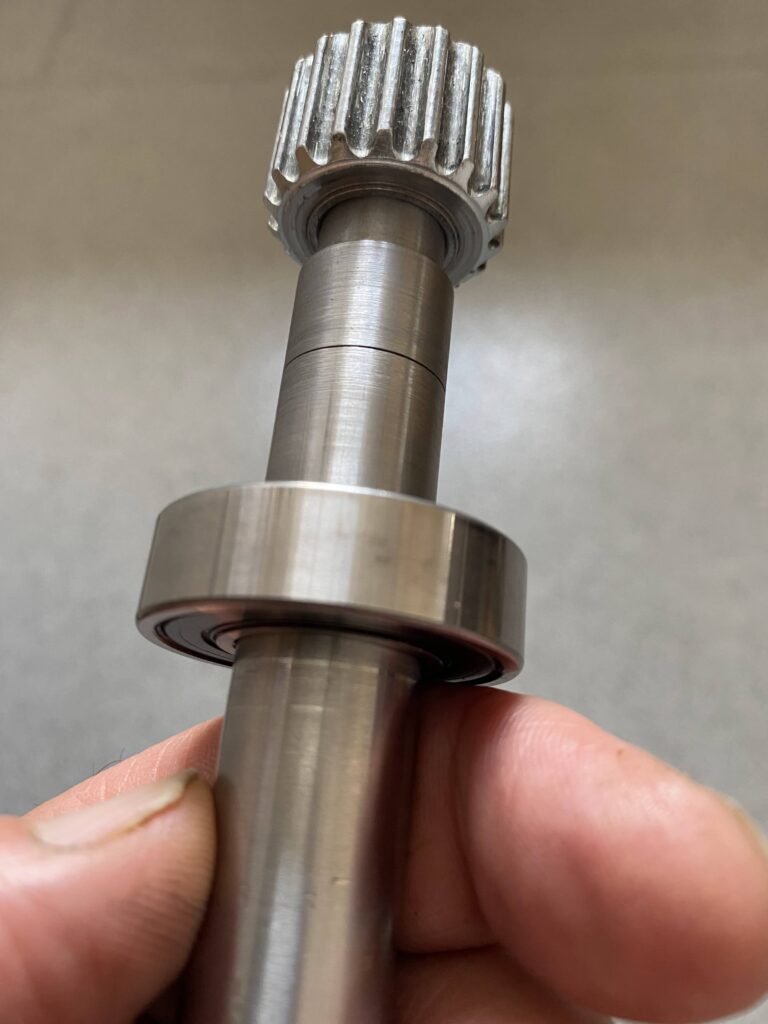
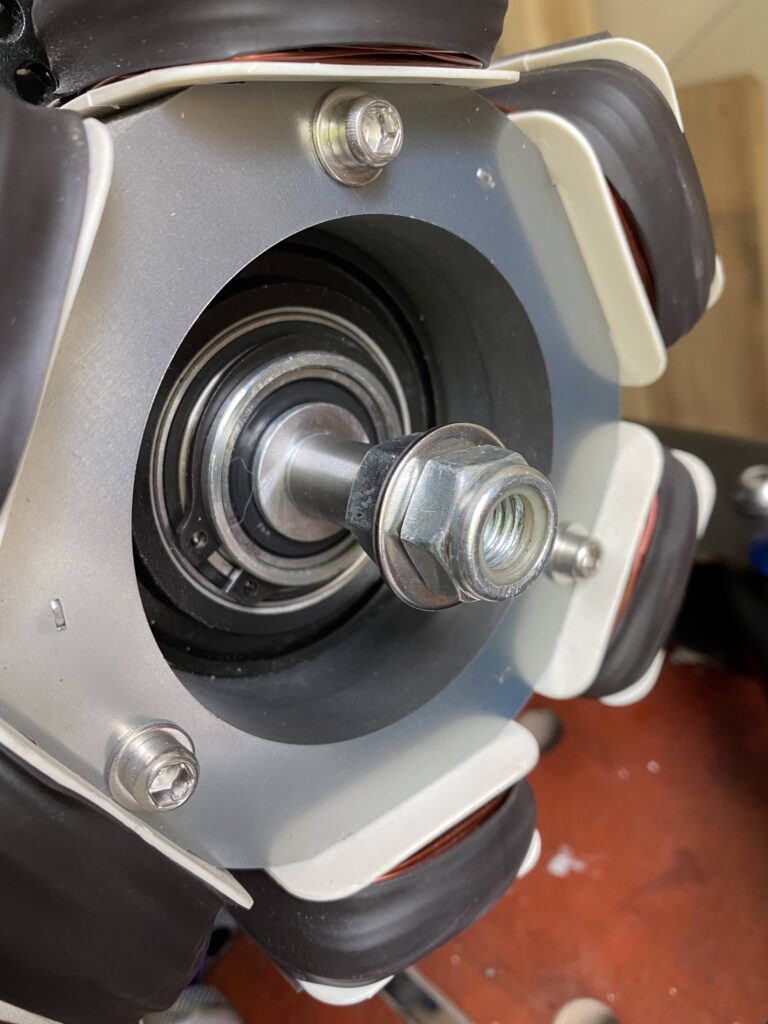
The most obvious problem I faced was that the two bearings supporting the belt drive wheel had been ground into metal shards and were completely missing. Those were easy enough to find, being fairly standard 6002 2RSH bearings. These measure 15x32x9mm. That’s 15mm internal diameter (the hole in the middle) 32mm outer diameter and 9mm thick.
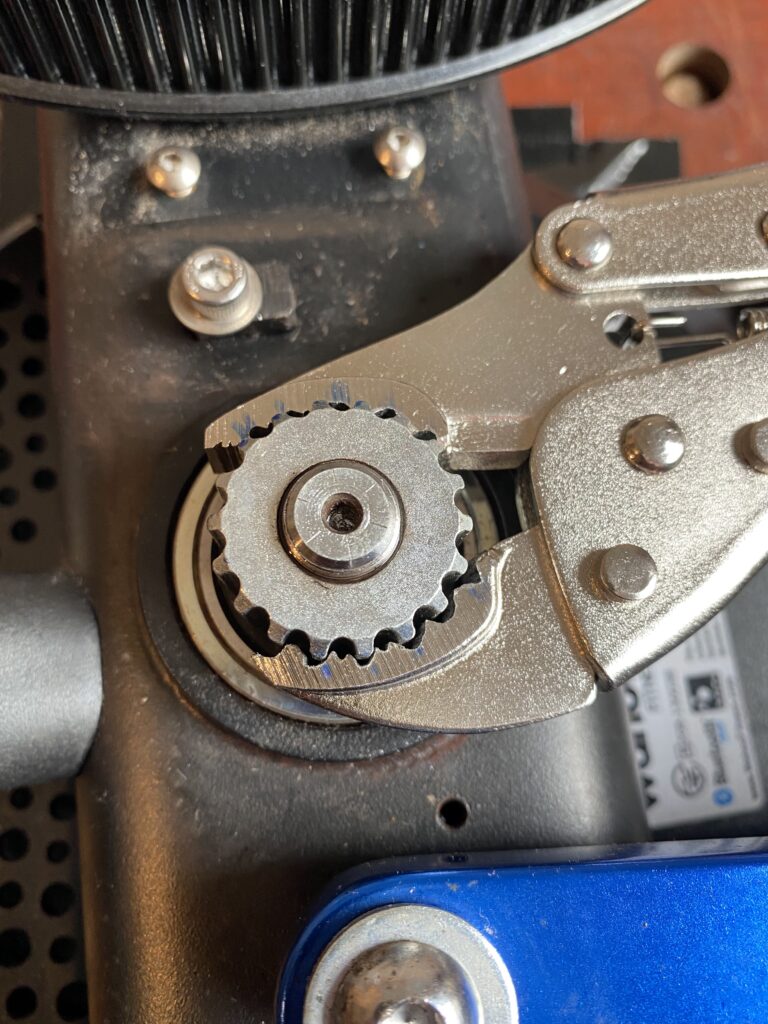
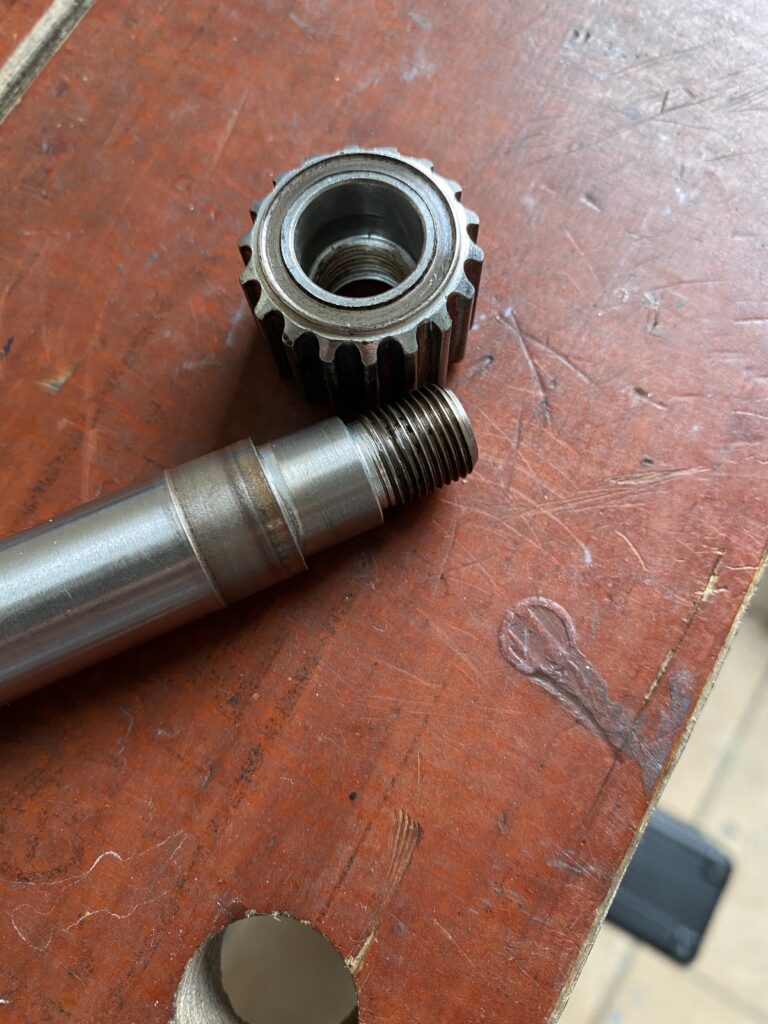
The next issue was the mashed pawls as well as the part the pawls engage with; that key part is known as a ‘ratchet ring’. This too had been ripped out, leaving only the threads it had been screwed into. It was totally missing! Worryingly, the threads themselves also looked worse for wear. In most hubs, in most wheels, this is the bit that the freehub drives.
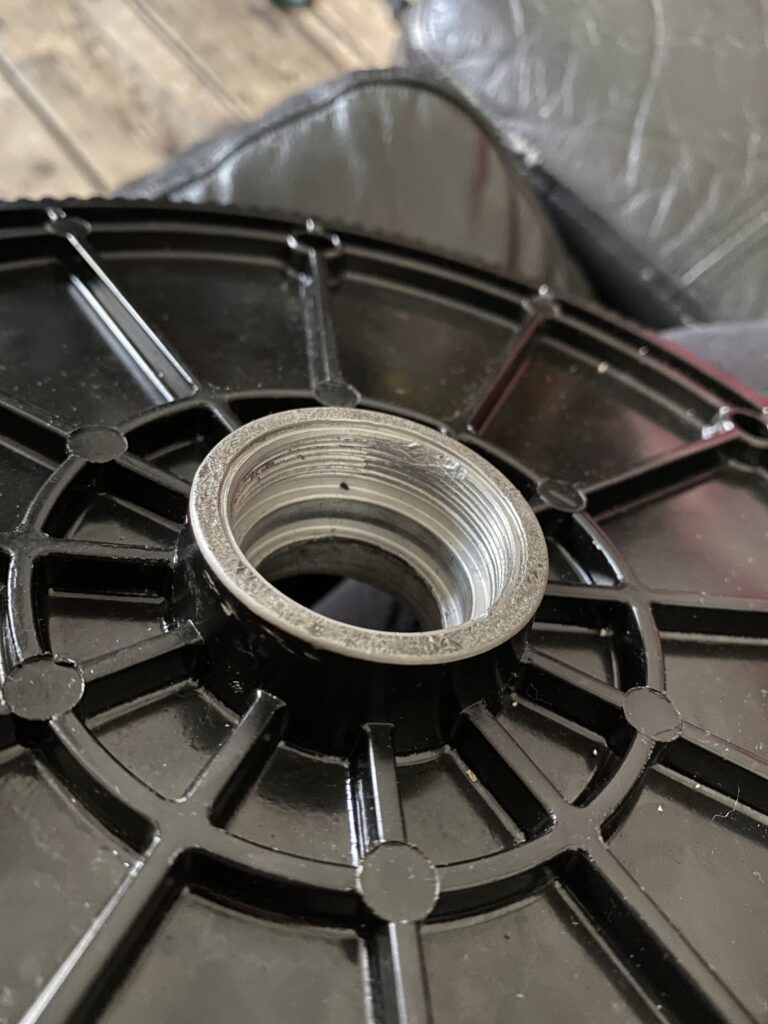
Many don’t realise these parts are replaceable. They usually screw in but can also be a splined push-fit. Hopefully, the pics posted above help visualise all this. So, I needed to source and replace that ratchet ring. Now, if I could find those parts, we may be able to rebuild her, Cap’n…
Going on a parts hunt
Naturally, my first port of call was Wahoo themselves. I hoped that, even if they couldn’t supply such old specific parts, they would be able to provide specifications for them. Then I could try to source them myself. Sadly, Wahoo refused to supply any information, claiming my version is now ‘unsupported’. My feelings about this warrants a conversation all of its own.
The ratchet ring
Ratchet rings come in a huge range of different sizes, so if you don’t have the exact specifications, it’s tricky. As the one on this Kickr had disintegrated, I was left with nothing to refer to. I had two challenges:
1. Work out what I needed.
2. Find a place to buy one.
The version 1 Kickr is different from the subsequent versions, so I couldn’t simply order the replacement kits available for those, as they don’t fit! So, I started posting on engineering and specialist internet chat forums, and approached hub manufacturers worldwide. As a backup plan, I also started searching for broken Kickrs to scavenge for spares. There must be thousands out there, but finding one proved super difficult.
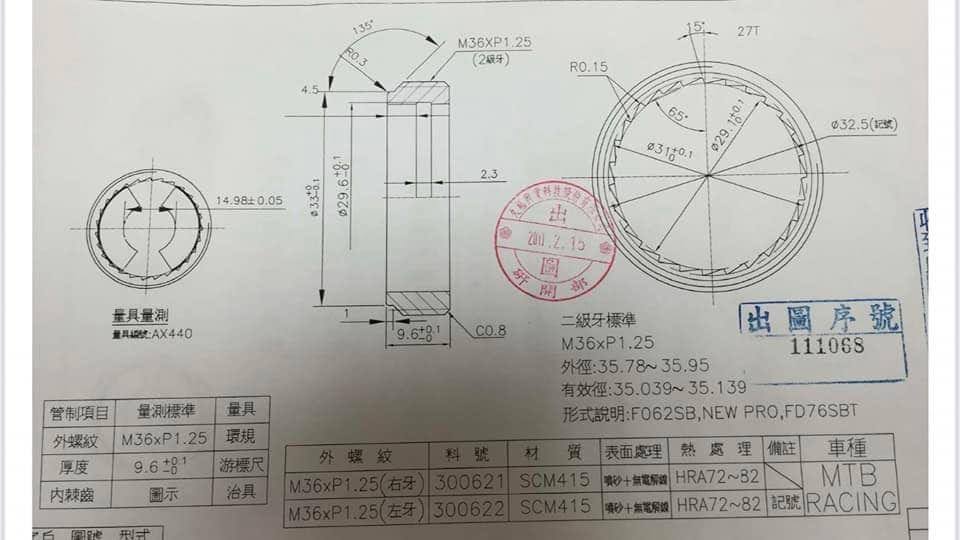
The journey took me deep into the wonderful world of engineering, of hub and freehub design and manufacture. I learned a huge amount. I found the original part has 48 teeth. With help from my newfound internet friends, I tried ratchet rings from DT Swiss, Sun Ringle, White Industries, Hed, and countless others until… we came up with a match…. A Novatec 27 tooth one. It was all we could find with matching threads. Of course, the tooth count was wrong. And yes the image below is of the original signed off Novotec spec sheet for the part!!!! As I had already struck up a relationship with a Novatec parts supplier, I asked them to send one through…
The parts hunt continues…
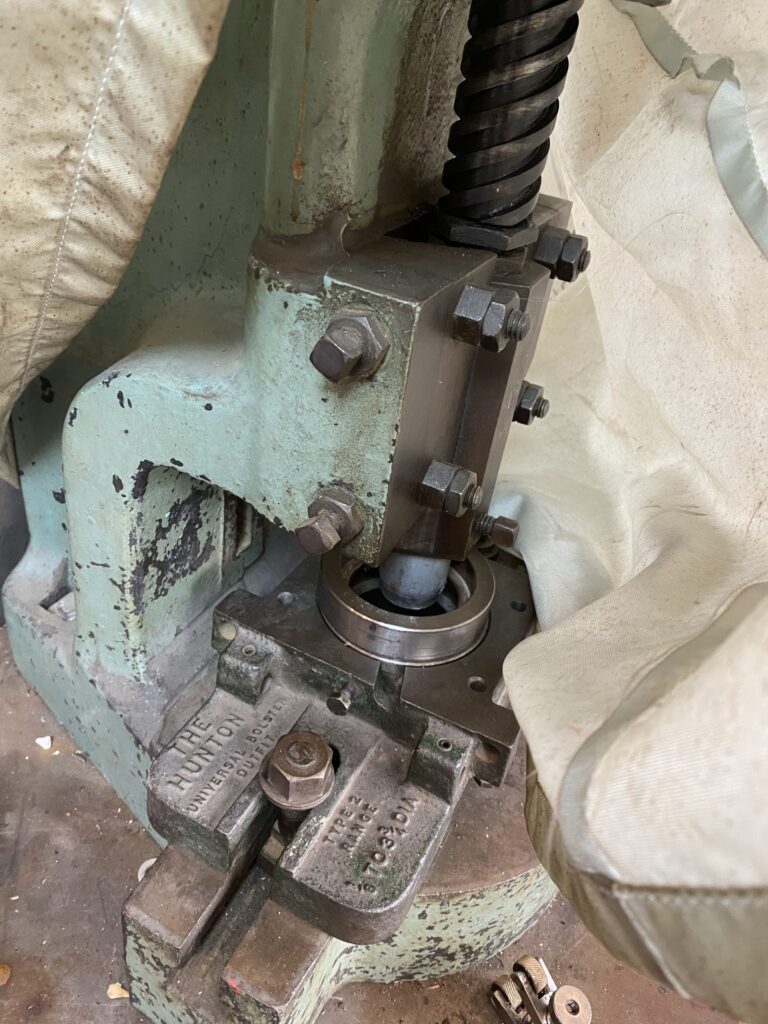
There was still more to do… I needed to ‘chase’ the crushed threads that accept the ratchet ring with a single point thread restoration tool, which I cycled out of London to pick up. I’d already ordered replacement bearings (6002), choosing to go with NSK ones, as they are the same as the ones originally fitted. I also ordered a pair of generic rubber washing machine feet of a similar size, with what I thought was the correct thread. The quick-release adaptor (nubbin) to replace the one I had lost was harder to get hold of.
Start of the repair process
Whilst waiting for the parts to arrive, I began servicing the Kickr freehub. There was some slight damage to the pawls that didn’t move freely in their sockets. Some very intricate work with a set of needle files, some fine wet & dry paper and grinding paste brought them back to the condition where they performed as they should.
Arrival of parts and some disappointment
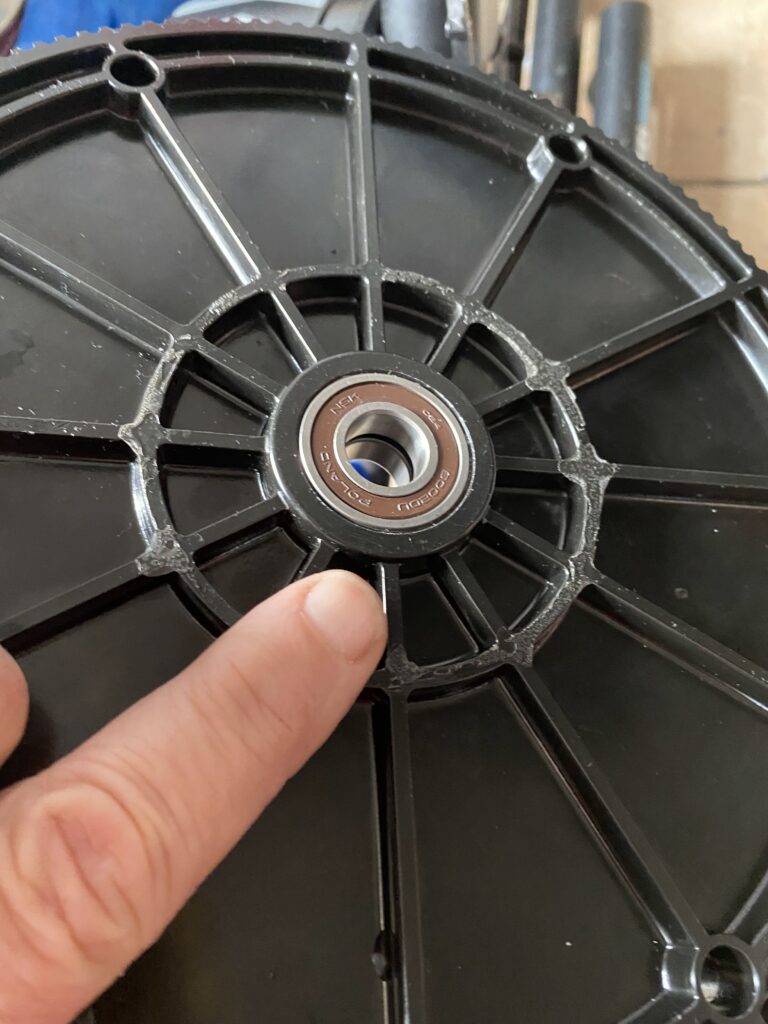
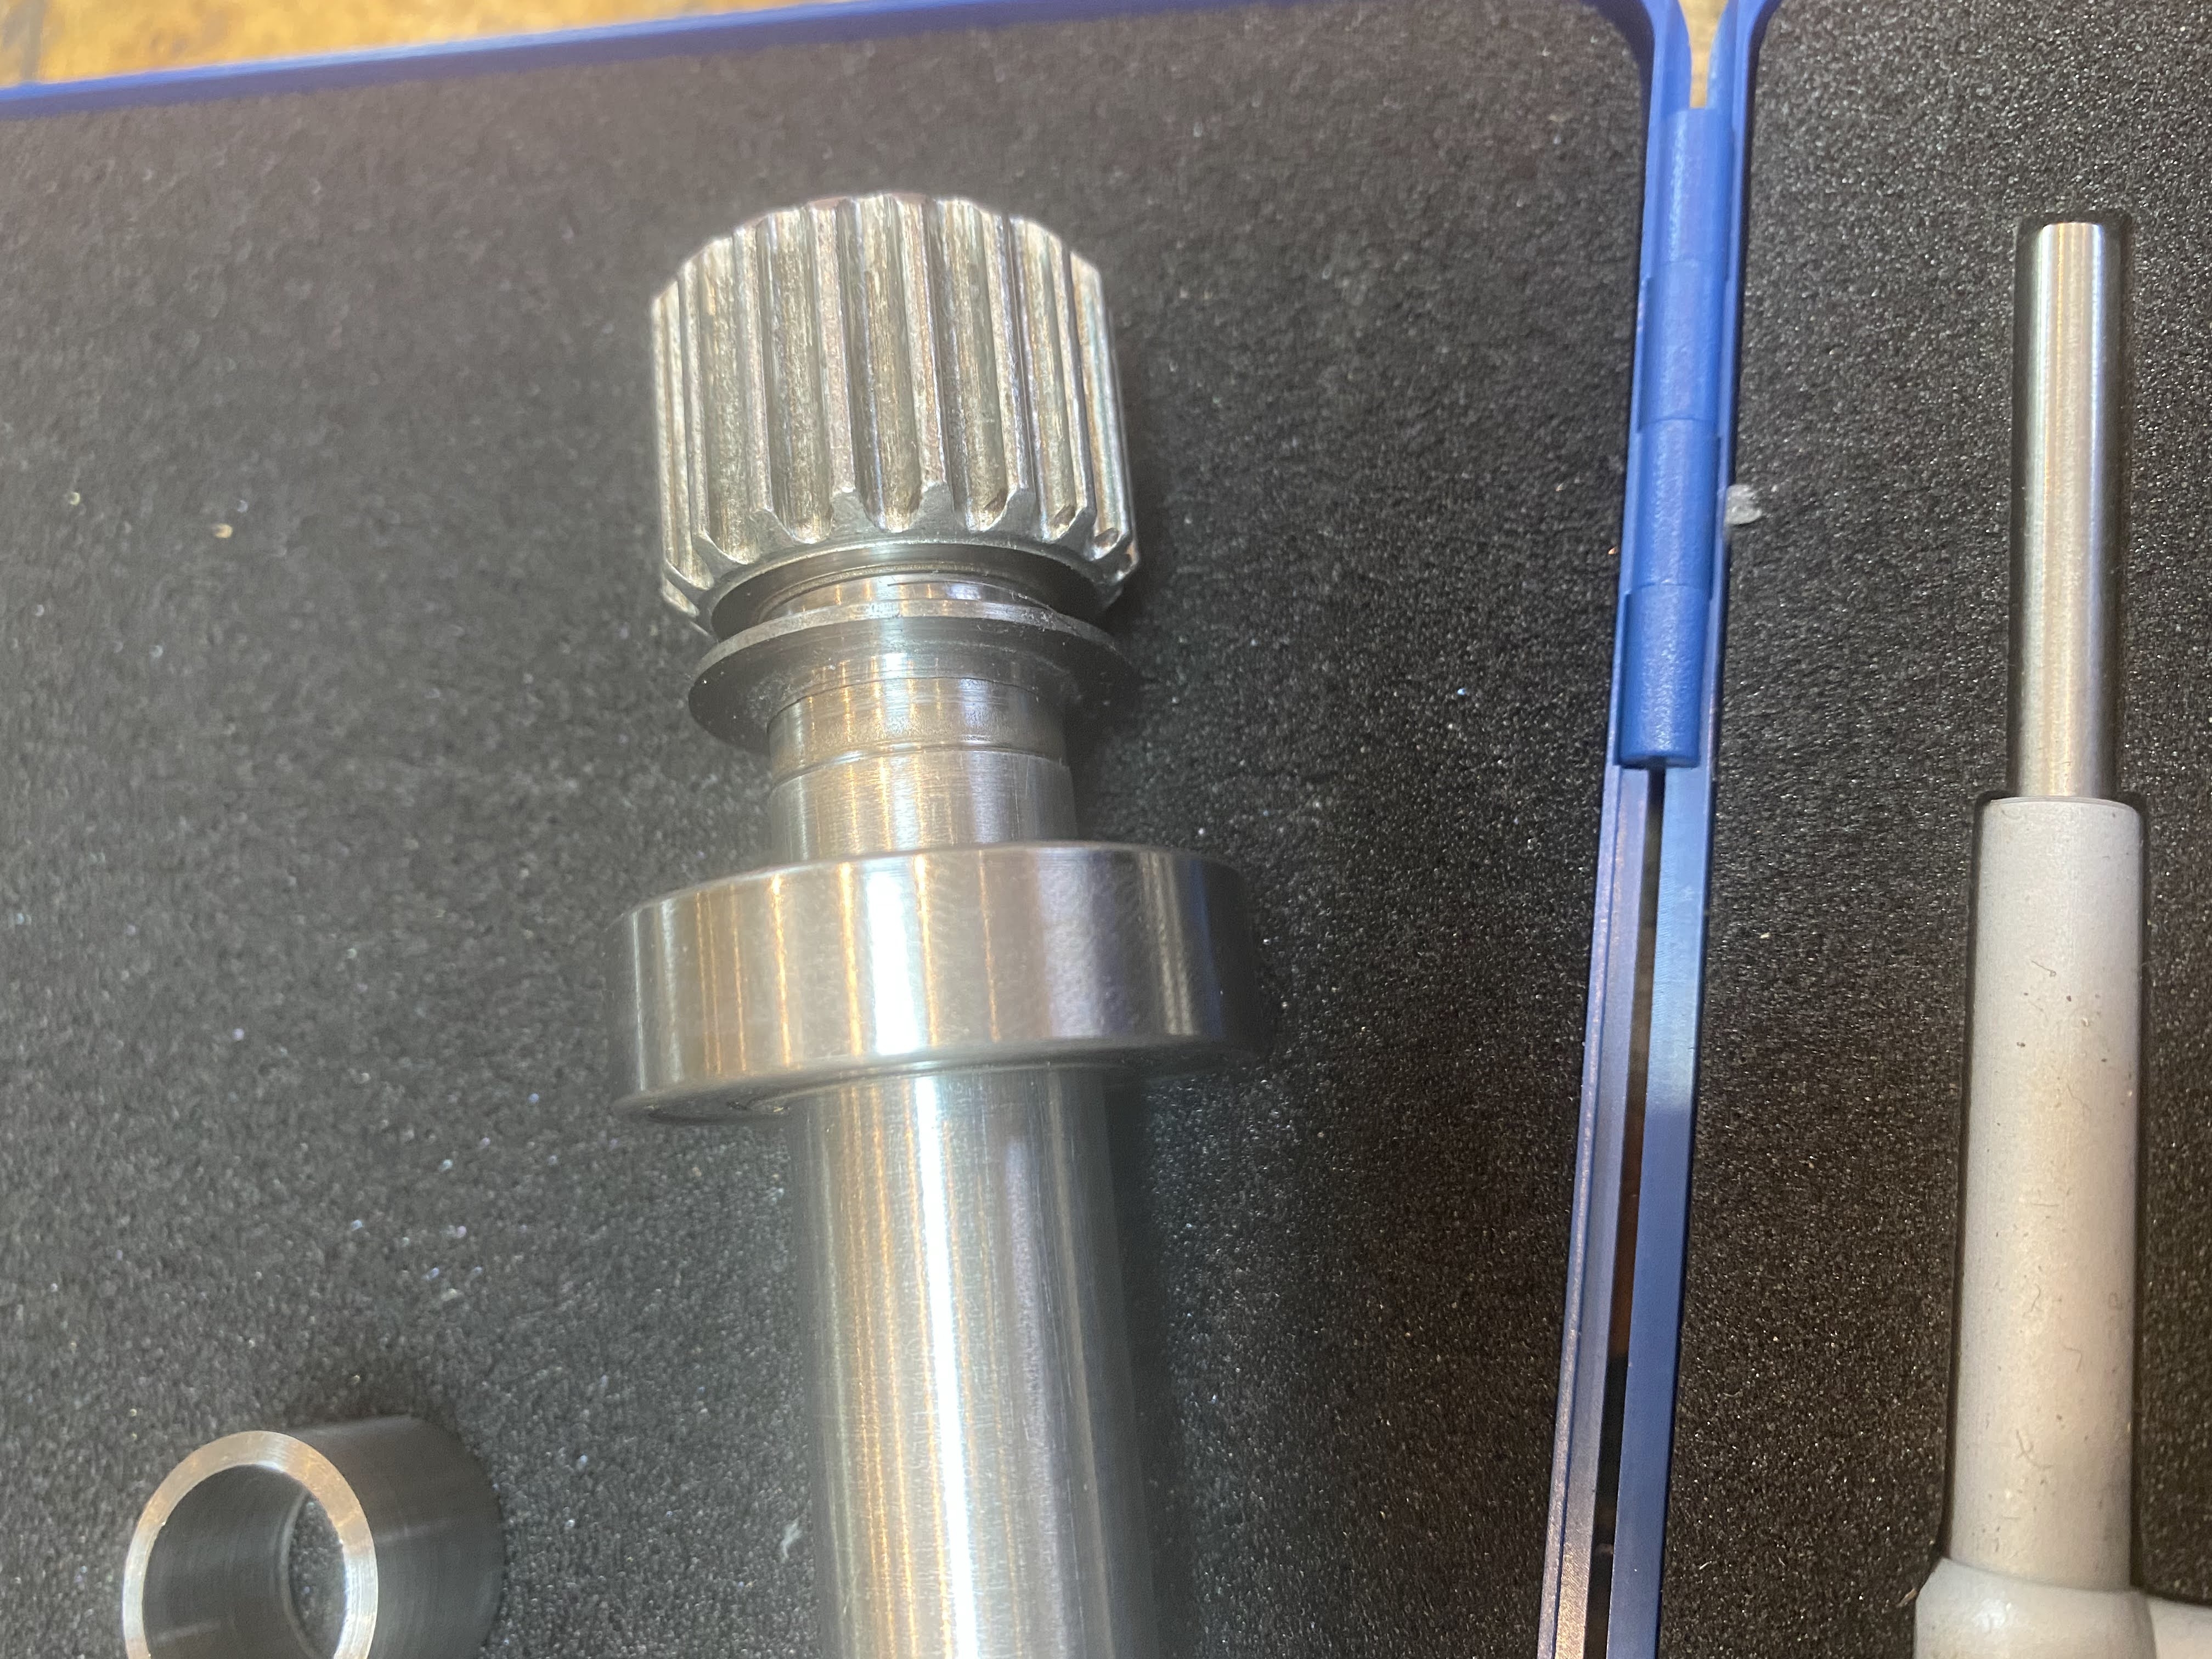
The bearings arrived first. It was simply a matter of pressing those into the pulley.
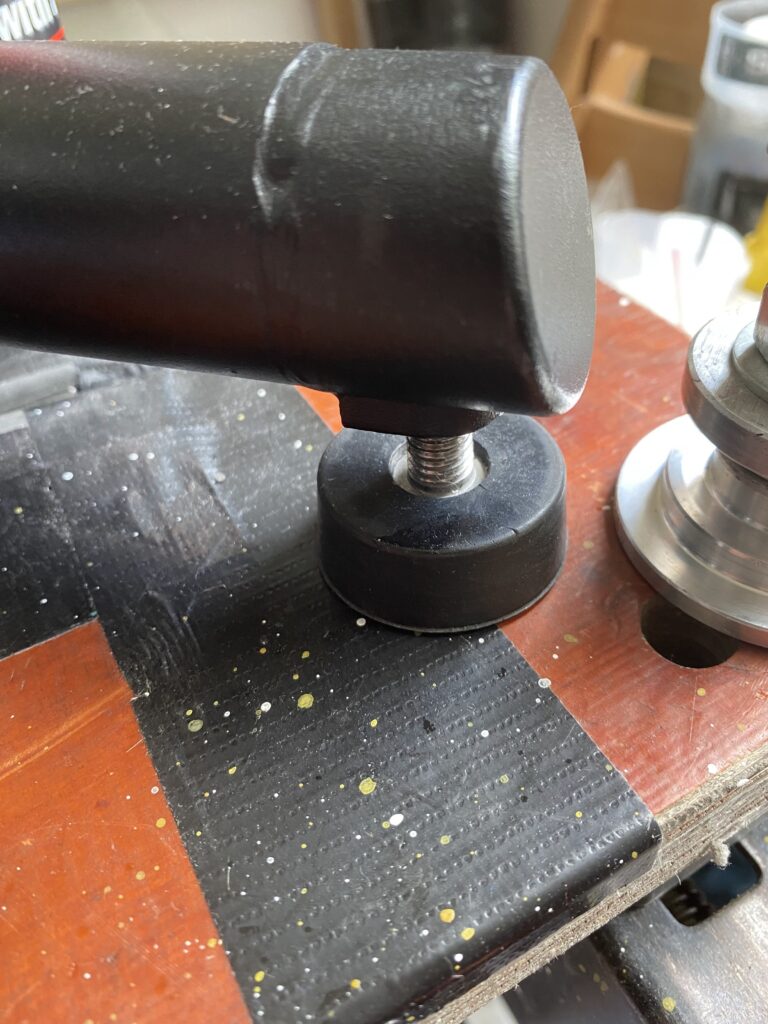
When the feet arrived I found that the M10 metric thread on the post didn’t fit. Being made stateside, the threads on the Kickr are Imperial. America never converted to metric, choosing instead to part ways with the rest of the world years ago. However, I could engage just enough threads for it to function. Back to the drawing board there then… Hey Ho…
The ratchet ring arrival
When the ratchet ring came through initially, I was a little concerned, as the fit seemed slightly loose. The concern was that the thread may not hold under the torque produced by the freewheel. On the other hand the benefit was that the mashed threads needed very little cleaning up. Thankfully, so far that thread hasn’t failed.
Unfortunately, though, the original Kickr freehub did not match the new Novatec ratchet ring. Boo…
…. But. The spare Novatec freehub I had hanging around does!! ???? Yey!!
Success, I was almost in the position where I could test this thing out. Spinney spin spin #shhhhhhhhh
Almost there – or so I thought
So, I wasn’t quite there yet, but well on the way…. I know too well that sometimes these things don’t always go according to plan. If this works, there’s one less thing consigned to landfill!!! #WinWin
I still needed to break out the callipers, measure some stuff up, draw some things out, then make/ scavenge/ find two new spacers to get the Novatec freehub to work properly. I had to visit a workshop to get some time on the lathe to turn out the final bits. After that, I can do a test build and see how it looks pieced together. #FrankenKickr
I could sense that it would take time before I could access the machine tools, and I needed to fashion the 2 spacers for the freehub. So, I ended up ‘ghetto-hacking’ them by cutting and filing a stainless steel pipe with an 18mm outer diameter (OD) using hand tools.
That pesky nubbin
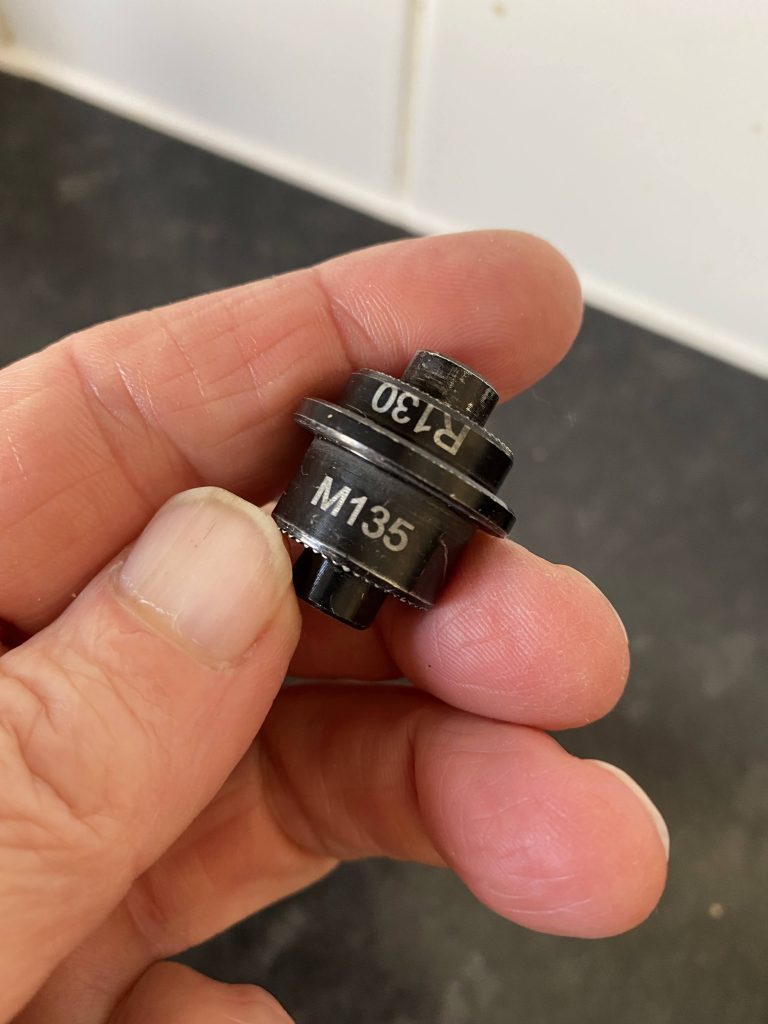
Then there was the small matter of those ‘effing adaptors Eran handed me, which I lost. Annoyingly, these too are ‘unsupported’, or at least not sold separately. Again, with a lathe I could make the quick-release one I would need. Before I committed to that, I trawled the net one final time and discovered a bike shop in Windsor advertising a Kickr adaptor kit – the only place I could find one that was in stock. I decided I would go for a bike ride to buy it. On the way I dropped in to Richmond Cycles on the off chance they may have, or know something, and…. Boom!!!! they let me have the nubbin I was missing!! (not the real name for the part, I made that up all by myself) #Chuffed. Thanks sooooo much Richmond Cycles…
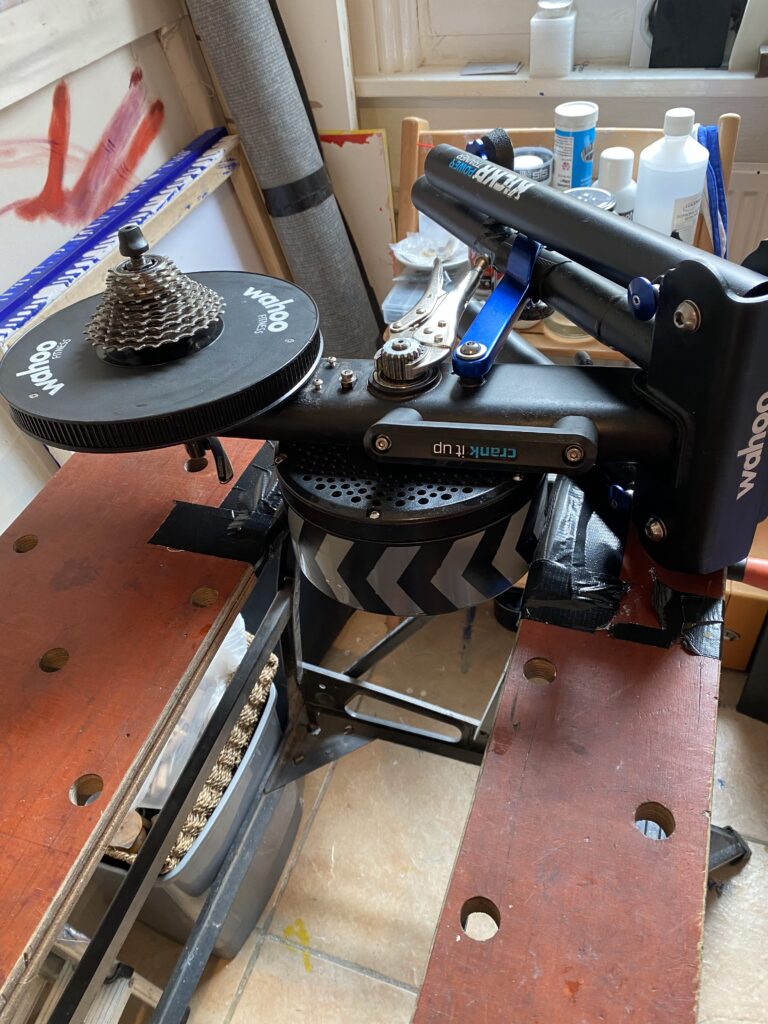
The first test flight – Yay!
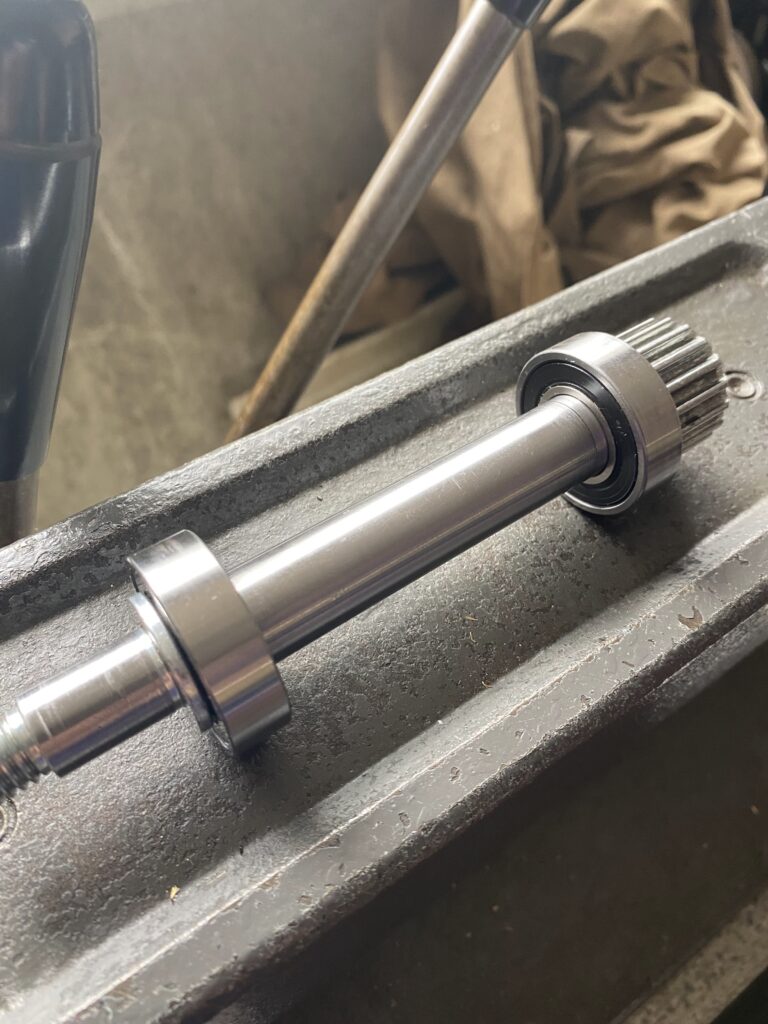
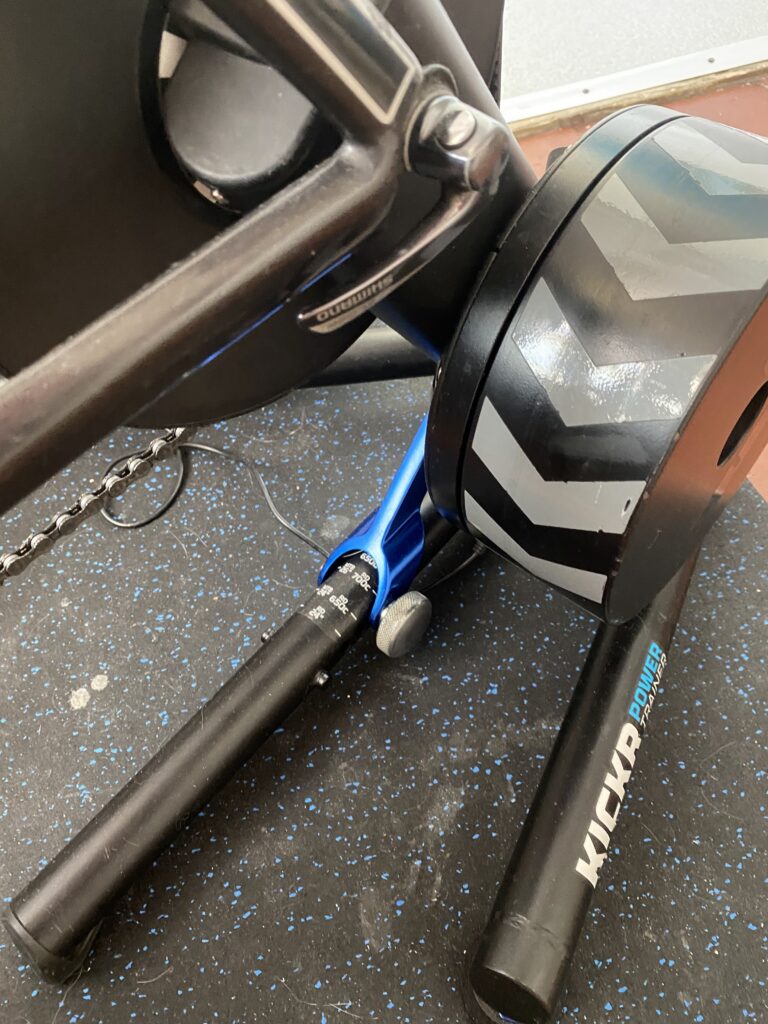
Finally, I was able to mount my bike to the trainer with the washing machine foot forced into the non-matching thread to see if everything worked. Yay! The Novatec hack totally worked! The freewheel spins nicely and the shifting is good.
On a short test ride, all ‘seemed’ to be working… ????
Nooooo 🙁
Boo. The next day I learned the Kickr was not quite right. It exhibited a rhythmic knocking noise. It was coming from the flywheel and was either a balancing thing or something else. The ride had loosened stuff and on removing the belt, I found the flywheel axle had quite a large amount of play, not detectable before. The good news was the repairs/hacks I’d already made were holding up. #BackToTheWheel-OnForTheTimeBeing…
Part 2:- Wahoo Kickr repair. Repairing and restoring the lower spindle and flywheel. (Getting to the heart of the matter)
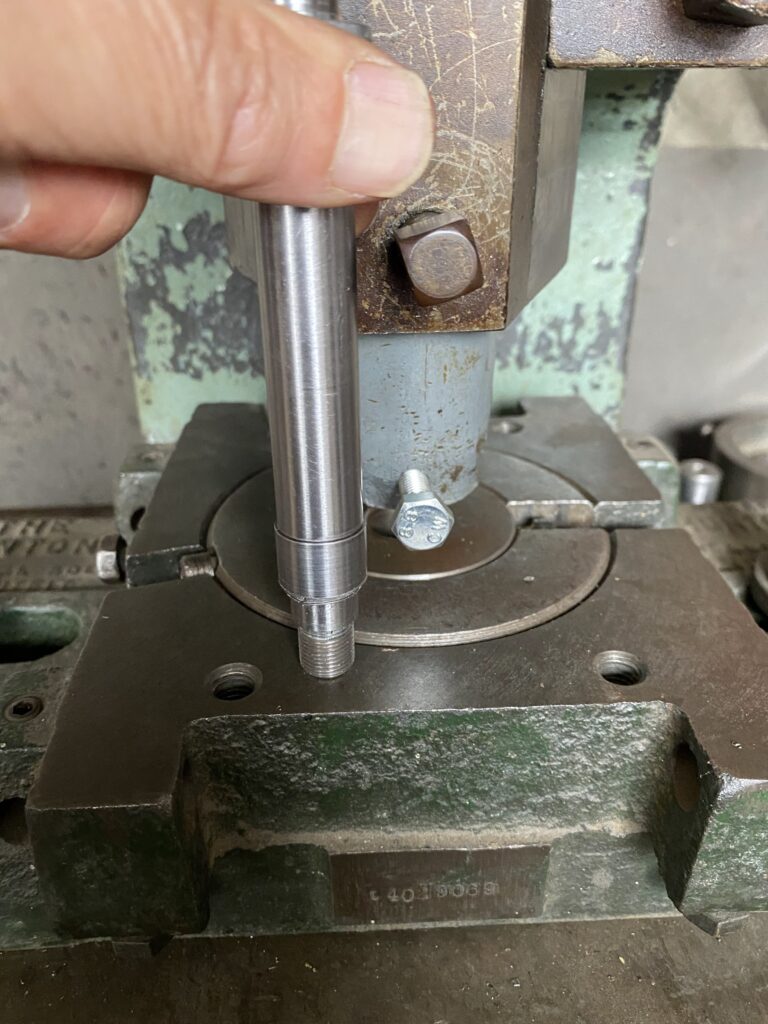
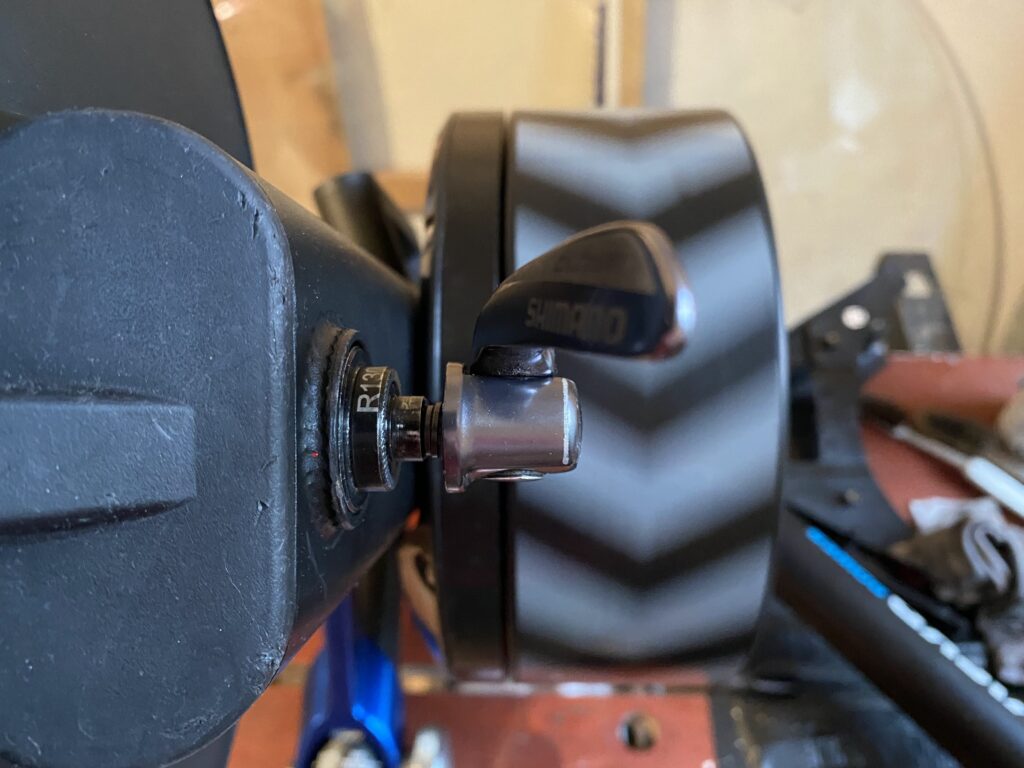
After further research, it transpired that worn main flywheel bearings were the issue. I could feel some play. I had hoped the bearing journals (the surfaces the bearings fit onto) might be OK, meaning I could simply swap out the worn bearings. These are accessed by removing the small drive pulley, which drives the flywheel. According to the best information I could find on YouTube, on early version Kickrs, you simply unscrew it. Bear in mind that every time you use the trainer, you tighten that small pulley on a teeny bit more!! With the watts I know this thing has seen, it must be hella-tight.
By this stage, I was invested. It was either: abandon this or rip that sucker to bits. A plan formed. With the right tool and enough torque that thing was coming apart. So…. One final push…
Committing to full-on open heart surgery.
Before you can access the screw-on cog, you’ll need to take off the belt tensioner and then the belt, in that order. This is simple – when you know how… In any case, it’s useful to know, as you’ll need to do this whenever you have to replace the belt… You simply use the screw adjuster to loosen the belt. Once the belt has enough slack it’s easy to remove the belt, which is now loose. You can then proceed to remove the retaining hex bolt holding the adjuster assembly together with the two bearings that are retained by a circlip… Done!
Removing the cog to access the bearings…
I did some research and watched others achieve what I was about to attempt. I’ll post links to these when I have a mo. The principle is to get a decent grip on the small cog and apply enough torque.
On YouTube, people managed it using some mole grips clamped to the cog. If you then use the middle leg of the Kickr as a stop, you can twist the flywheel to loosen it. However, without special tools, this is easier said than done.
Be cautious though… I almost broke my wrist trying to torque it off on the first attempt. FECK! Months later, I’m still having to rehab the tendons in my left hand. On my initial tries, things either ended up slipping or resulting in me not being able to apply enough torque. I needed a modified plan.
This was getting serious. The cog’s made of decently hard steel, so it could withstand being gripped hard without suffering much marking. I roughly filed some teeth into the cheap mole wrench to get a better grip.
Success!
I held the flywheel in the jaws of a workmate, with sections of an old bicycle tyre taped to the jaws for added grip. Then, I used my full body weight together with the weight of the Kickr while using its legs as a leaver and gave it some berries; a proper weight-training workout.. There are benefits to being chunky… Boom it was mine!!!
Usefully, the threads of the cog had been prepped in the factory with a coating that prevented it from galling and corroding. Without this, there’s a good chance the cog would have been cold fused to the axle thread. In my case, the cog span off the spindle and there it was, exposed.
Totally f****d
Christ, it was a mess. The cog had worn into the bearing, causing it to seize and make the axle spin inside the bearing itself!
The action ground a groove into the journal on the axle at the same time as enlarging the internal diameter of the bearing, producing a rusty brown dust… basically, it’s totally f******.
The treatment consultation
Two things needed to be sorted here; the axle, where the bearing journal had worn away, and the wear on the back of the cog, which would no longer provide any pre-load for the bearings. I needed at least one new cartridge bearing.
Solutions I considered for the axle were:-
- Machine down the axle diameter, then heat shrink or press fit a sleeve on the axle, which could be turned down to size.
- Get the worn area chrome plated and ground to the required size.
- Fit a tolerance sleeve or Delrin ‘top hat’ to accommodate a bearing with a larger internal diameter (ID).
- Source a new axle.
Solutions for the worn cog:-
- Make a washer/shim to pre-load behind the cog.
- Brazing/welding some new metal and machine to tolerance.
- Source a new part.
The ghetto fix alternative
All the above would take time, tools and money… The cheapskate, no/lo cost alternative would be to go full “ghetto fix” and swap the bearings around, using the slightly oversized bearing on the good axle journal, use epoxy with some thin stainless sheet to make things fit and file down a penny washer to fill the slack and ride…
What think you?
This was a lot to consider. I asked some of the people who were following my journey down this convoluted rabbit hole for feedback on the above considerations…
- A “ghetto fix”, whilst cheap, was likely to be quite temporary.
- Delrin top hats on bottom bracket axles works brilliantly, but they are totally untested in this application. It also comes with some cost for the materials and an oversized bearing.
- Getting someone to chrome plate and grind the axle would take time and chunky money.
- I would rather not have to go through removing that cog again after my mini watts tighten it back on….
- I knew I could properly fix it given lathe access in the fullness of time, which I didn’t have at that moment.
So everything considered; the cost of stock, the time and the effort, fitting a sleeve seems to be my favourite solution! It’s a relatively simple 20-minute job with the right tools and appropriate skills. Annoyingly, I didn’t know of an accommodating machine shop in London’s West End, otherwise I’d get a quote….
The sunlit upland was that I’d joined a makerspace, with all the tools I needed to do this. My access to the lathe was pending, dependent on a safety induction. All I needed was some patience and skill.
Musings
It occurred to me that there must be thousands of Gen 1 Kickr owners out there with issues… I bet there’s a huge amount of trainers broken and rusting away in the corners of garages or cupboards… This stuff is very fixable with the right parts and a little knowledge.
Getting the green light on the consent form
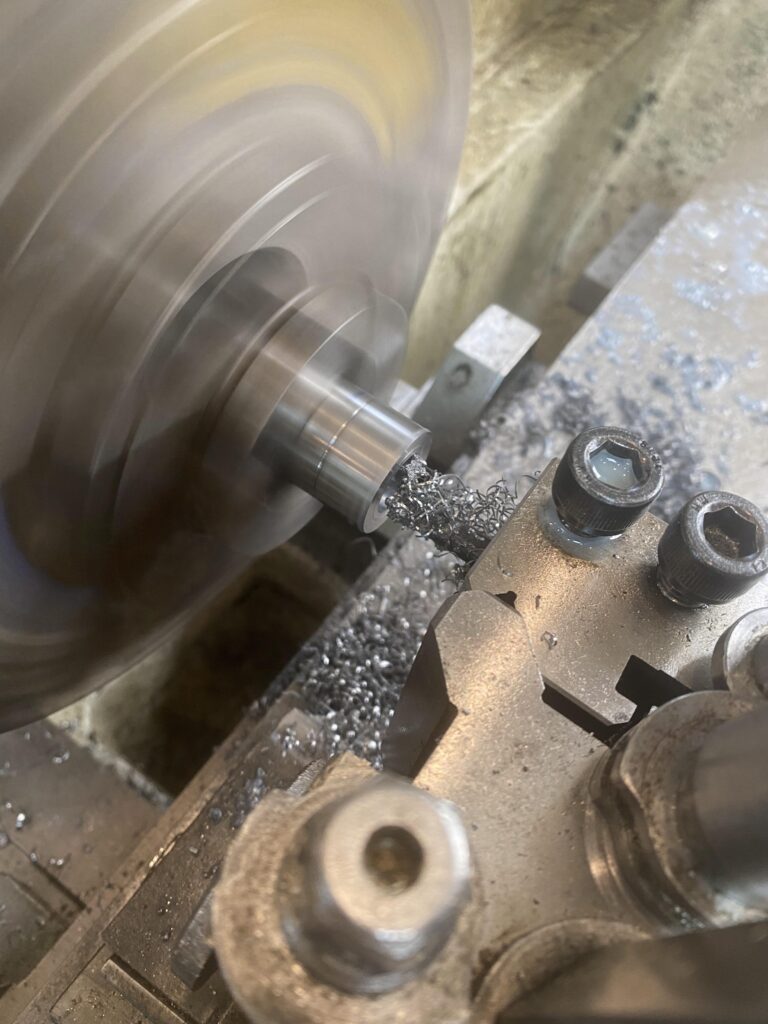
Some weeks later…. The lathe access had been granted. I was now able to machine bespoke, precision bike bits and tools… Think bearing presses, thru-axle adaptors, end caps, cone spanners, axles from metals, and even carbon fibre…. Now to bring the Kickr back to life…
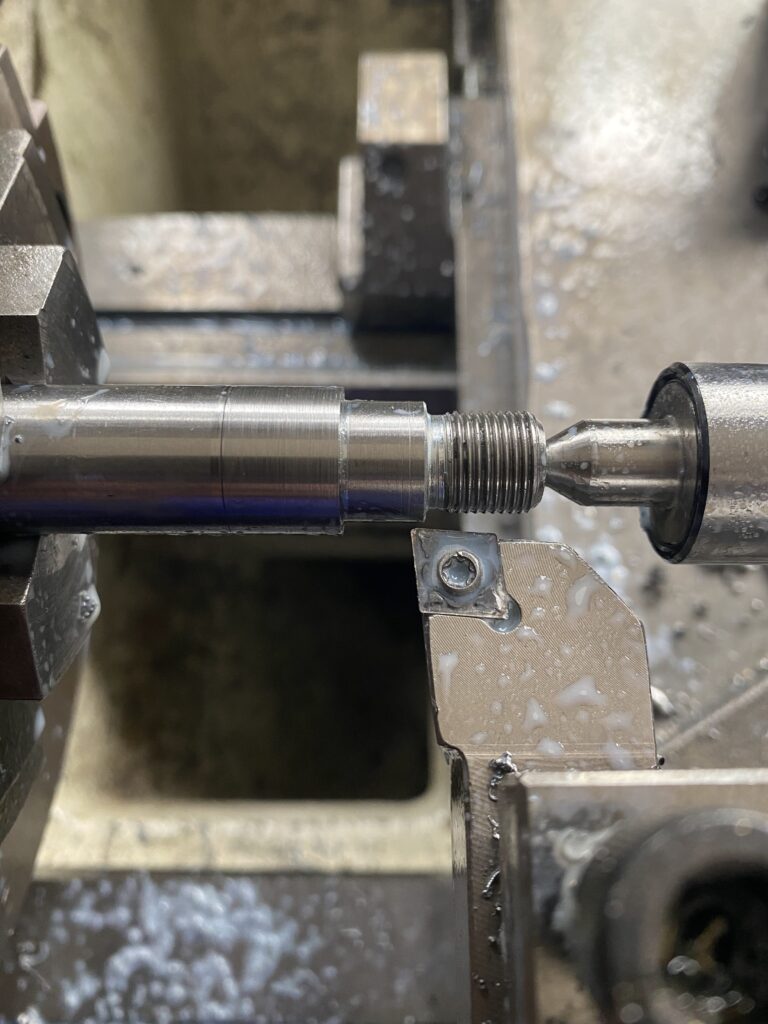
Diving into the axle detail

Here’s the Kickr axle being set up in the lathe to remove the brown crud and take it down to size before machining and press-fitting a repair sleeve. During manufacture, the axle itself was CNC-machined to a nice ‘toight’ tolerance of less than 100th of a mm. This is quality work from the people Wahoo contracted to produce it – it’s part of what you’re paying that big money for when you buy a Kickr thing-a-me… Knowing what I know now, having made the new parts and reassembled one, I can see the retail price you pay for a hi-end trainer is fair.
The nature of subtractive manufacturing means that if you take too much material away, you’re screwed. So, I took the precaution of reverse engineering the axle and producing a CAD drawing of the part to spec.
A clear printout with all the dimensions would provide some security when I was somewhat rusty at using a full-size precision lathe. With drawings in hand and a clear plan in mind, I set about ordering the steel round bar I needed to make the sleeves and other bits. I then headed to the workshop, with everything in hand.
The repair nitty gritty
First, I faced the back of the cog, effectively de-burring it. Then, I set about turning down the worn axle to dimension and producing the sleeve.
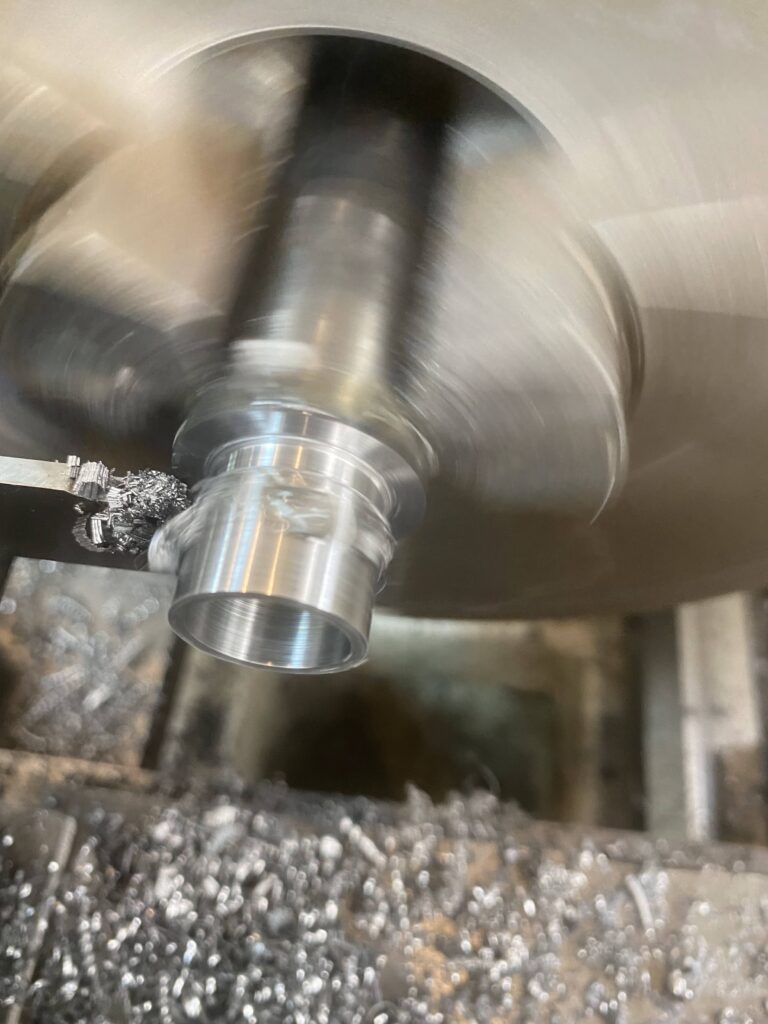

At first, the press-fitting of the sleeve didn’t go to plan, as I couldn’t find a press with the necessary clearance and I needed to return another day to wrestle with that challenge.
I won the fight with the help of a fly press. Once the sleeve was pressed into place, it needed to be turned down to spec.

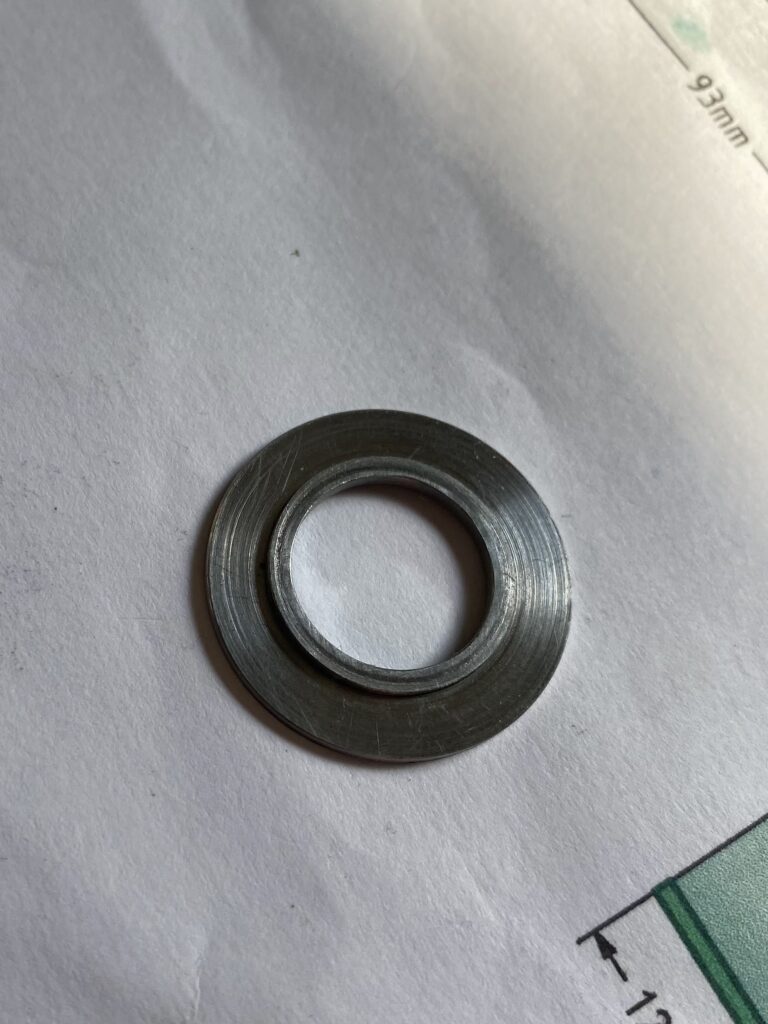
After making a washer to take up the slack left from the material worn away from the back of the cog, I was ready to get back home and see if everything fits…

Putting it back together again…
All that remained was for me to put the thing together in the reverse order that had I dismantled it and give it a test.
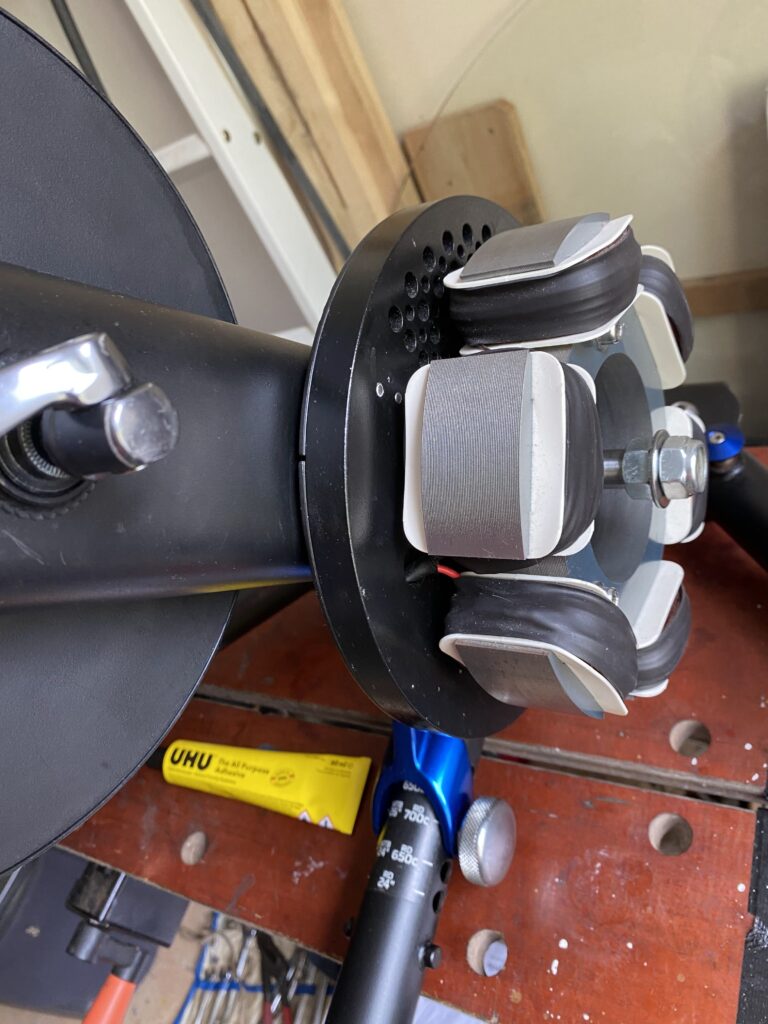
Once the axle was installed with its new bearings, the trickiest bit was to get the key aligned with the flywheel at the same time as fitting it over the 6 electromagnets that act on it to provide the resistance. The flywheel is tightened using a 22 mm socket wrench.
I added the spacers I’d machined before screwing back on the cog. I wiped a little Uhu contact adhesive onto the threads before screwing it back on in the hope that it would prevent the cog from seizing onto the thread over time. Then, it was a simple matter of installing the drive belt and tensioner.
Ta Da! Finally the Kickr is back.

All clean, adjusted and shinny. Three hours into a test ride and all seemed A-OK.
… And, I won’t accept any criticism for still using a £5 washing machine rubber foot, when the official ones are £80!!!
I’ll let the ongoing updates on the club’s discord chat fill in some final detail…
Clubmates: Amazing! ???? What great work. Will it make you any faster knowing that you basically built your own turbo? ????
Me: Haha, well… the short answer… NO! Sadly I can’t fix my legs ???? ????????
Clubmates: Heroic work!
Clubmates: Does it sound nice and smooth now the worn bits are gone?
Me: Put it this way… I would have posted a video I made of it working, but all you could hear was the family bitching in the background… haha ???? #EmbarrassingOrWhat?
Clubmates: But it works???
Me: Yeah! Like new – not that I’ve ever had a new one to compare it to!
Leave a Reply